So far we’ve covered four big buzzwords used in our application:

  1. Model-View-ViewModel
  2. Room
  3. RxJava
  4. Repository Pattern

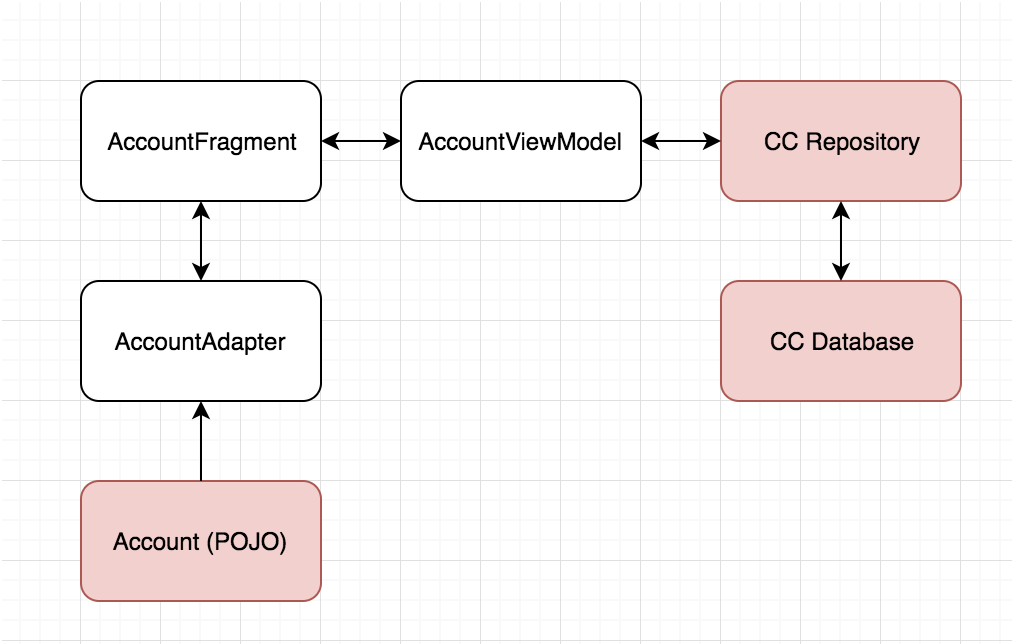
Now, we should circle back to the beginning. Following our diagram outlined in the previous parts, the next component we can begin to work on is our AccountViewModel:
Android Essence

Naturally, this may bring up some confusion. We already discussed ViewModels in part 1. Well, depending on context, we may not be referring to the same thing.

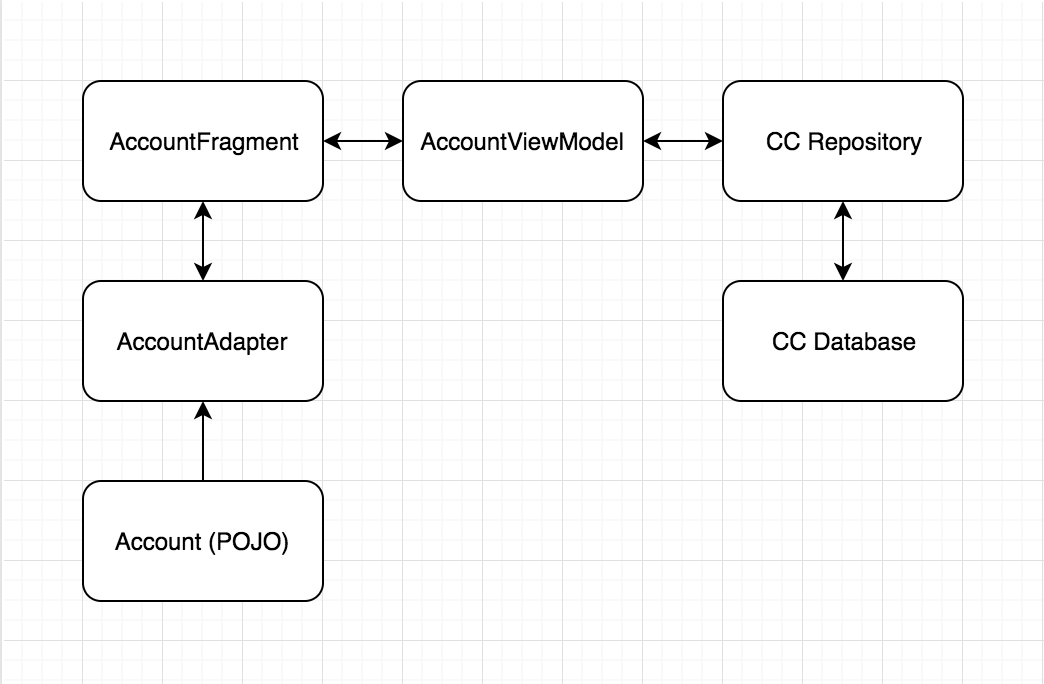
In part 1 we discussed how we were going to architect the various components of our application. Now it’s time to build them. To understand what we should build first, we should revisit the diagram:

MVVM

I would start with three spots:

  1. The account
  2. The database
  3. The repository

A good rule of thumb to remember this, is that these nodes don’t depend on anything else just yet (well, the repository depends on the database, but that was included). I can’t build my ViewModel until I have my repository, and so on.

Let’s start with persistence.

When you’re starting out with Android development, and even as an expert, you will hear about a lot of different architecture patterns. Anything from:

  • Model-View-Controller
  • Model-View-Presenter
  • Model-View-ViewModel
  • Model-View-Intent

It can be extremely hard to know which one to pick, what their differences are, and why they matter. I will tell you that even with my three years of Android experience at the point of writing this, I have trouble answering the first two questions. I can, however, explain why these architecture patterns matter - and it boils down to the idea of separation of concerns.

MVVM? Retrofit? RxJava? Data binding? Architecture components? LiveData? Kotlin?

Right now, these buzzwords are heard all over the Android community. Every podcast/blog/conference talk is referencing one of these. Which can be very intimidating to new developers. Which one should I learn first? Do I need all of them? What are these things even used for?

The purpose of this series is to break all of that down, and show that none of these buzzwords are truly that scary. We’ll go over an application I’ve published called CashCaretaker which is a simple finance tracker with all data stored locally on the device. It uses all of the buzzwords I mentioned further up, and we can go through them step by step.

You can checkout a simple gif of the project here:

When Android released version 6.0 Marshmallow (yes, a little outdated at this point), a whole slew of new developer APIs came with it. One that I’ve personally enjoyed as a consumer is fingerprint authentication. I skimmed over the official docs, and even through their Fingerprint Dialog Sample but had a difficult time following what was going on.

Eventually, though, I was able to recreate the flow. This post is going to be a step by step guide to integrating your own fingerprint dialog in your Android application.