Storing Network Responses With Apollo Normalized Cache
In our previous post we looked at the HTTP cache from Apollo Android for storing network responses. In this post, we look at its counter part, the normalized cache.
Disclaimer
This post is written assuming some basic knowledge of the Apollo Android library and GraphQL. If you’re unfamiliar with the topic, you can start with the official documentation, or with this presentation from Android Makers 2020.
You can find a sample project with all of the code from this blog post on GitHub.
Normalized Cache
The normalized cache stores information by an ID, so that if we’re looking up that information in the future, we can return that instead of making an additional network request. This post will walk through the different types of normalized caches we can create, how to debug them, how to observe changes, and even modify our caches if necessary.
How It Works
Unlike the HTTP cache which stores our responses in a file system, we have two ways to use a normalized cache.
- An in-memory cache, which will live as long as our application is alive.
- A SQLite cache, which stores information in a SQLite database and will persist across application sessions.
We can implement one or both of these caches, and chain them together if necessary. Let’s take a look at setting up each one, and when we go over how to debug these caches, it will become more clear about how information is stored for us.
Implementing In Memory Normalized Cache
To create an in memory cache, we need to define an EvictionPolicy. This is the configuration for determining if/when things should be removed from our cache. We can do so based on size, number of entries, and even the time since data was stored. From there, we can create an instance of LruNormalizedCacheFactory and use this in our ApolloClient:
val evictionPolicy = EvictionPolicy.builder()
    .maxSizeBytes(10 * 1024 * 1024)
    .maxEntries(100)
    .expireAfterWrite(1, TimeUnit.HOURS)
    .expireAfterAccess(1, TimeUnit.HOURS)
    .build()

val inMemoryCache = LruNormalizedCacheFactory(evictionPolicy)

val apolloClient = ApolloClient.builder()
    .normalizedCache(inMemoryCache)
    .build()
The benefits of an in memory cache are that reads from this cache are very quick, as we don’t need to read from a database or a file of any kind. The downfall is that it won’t be persisted between application sessions. If we need that, we can add a SQLite cache as well.
Implementing The SQLite Normalized Cache
The SQLite normalized cache is a separate dependency for Apollo. This stores information in a database, which enables that information to be stored in between application sessions.
To create an instance of this normalized cache, all we need to is supply our application context and a name for the database:
val sqliteCache = SqlNormalizedCacheFactory(applicationContext, "countrycache.db")

val apolloClient = ApolloClient.builder()
    .normalizedCache(sqliteCache)
    .build()
Chaining Caches
We may want to have the best of both caches. The speed of reading from memory, as well as the persistence of a SQLite cache. Thankfully, we can do so with the chain method:
val inMemoryCache = LruNormalizedCacheFactory(evictionPolicy)

val sqliteCache = SqlNormalizedCacheFactory(applicationContext, "countrycache.db")

val inMemoryThenSqliteCache = inMemoryCache.chain(sqliteCache)

val apolloClient = ApolloClient.builder()
    .normalizedCache(inMemoryThenSqliteCache)
    .build()
Querying From The Cache
Creating a cache and applying it to our ApolloClient instance isn’t enough. We also need to tell the application when and how to use the cache, which we do through one of the ResponseFetcher implementations. We have two ways to set a ResponseFetcher.
We can choose to set a default for our ApolloClient:
val apolloClient = ApolloClient.builder()
    .normalizedCache(normalizedCache)
    .defaultResponseFetcher(ApolloResponseFetchers.CACHE_FIRST)
    .build()
Or we can choose to set it per query:
val response = apolloClient.query(query)
    .toBuilder()
    .responseFetcher(ApolloResponseFetchers.CACHE_FIRST)
    .build()
    .await()
Debugging The Cache
Now that we’ve created our cache, applied it to our client, we can look into debugging our cache. How we debug our cache can vary depending on which one we implemented.
Printing The Cache
Apollo offers a handy tool for printing our caches. We can get a cache dump, use the utility method to prettify the dump, and then print it to the logcat:
val normalizedCacheDump = apolloClient.apolloStore.normalizedCache().dump()
val formattedDump = NormalizedCache.prettifyDump(normalizedCacheDump)
Log.d("ApolloNormalizedCache", formattedDump)
For the sample app, our cache becomes quite large, but here’s a short snippet of what we can get:
OptimisticNormalizedCache {}
LruNormalizedCache {}
SqlNormalizedCache {
    "countries.0.continent" : {
        "__typename" : Continent
        "code" : EU
        "name" : Europe
    }

    "countries.0" : {
        "__typename" : Country
        "code" : AD
        "name" : Andorra
        "continent" : CacheRecordRef(countries.0.continent)
        "capital" : Andorra la Vella
        "emoji" : 🇦🇩
    }

    "countries.1.continent" : {
        "__typename" : Continent
        "code" : AS
        "name" : Asia
    }

    "countries.1" : {
        "__typename" : Country
        "code" : AE
        "name" : United Arab Emirates
        "continent" : CacheRecordRef(countries.1.continent)
        "capital" : Abu Dhabi
        "emoji" : 🇦🇪
    }

    // ...
}
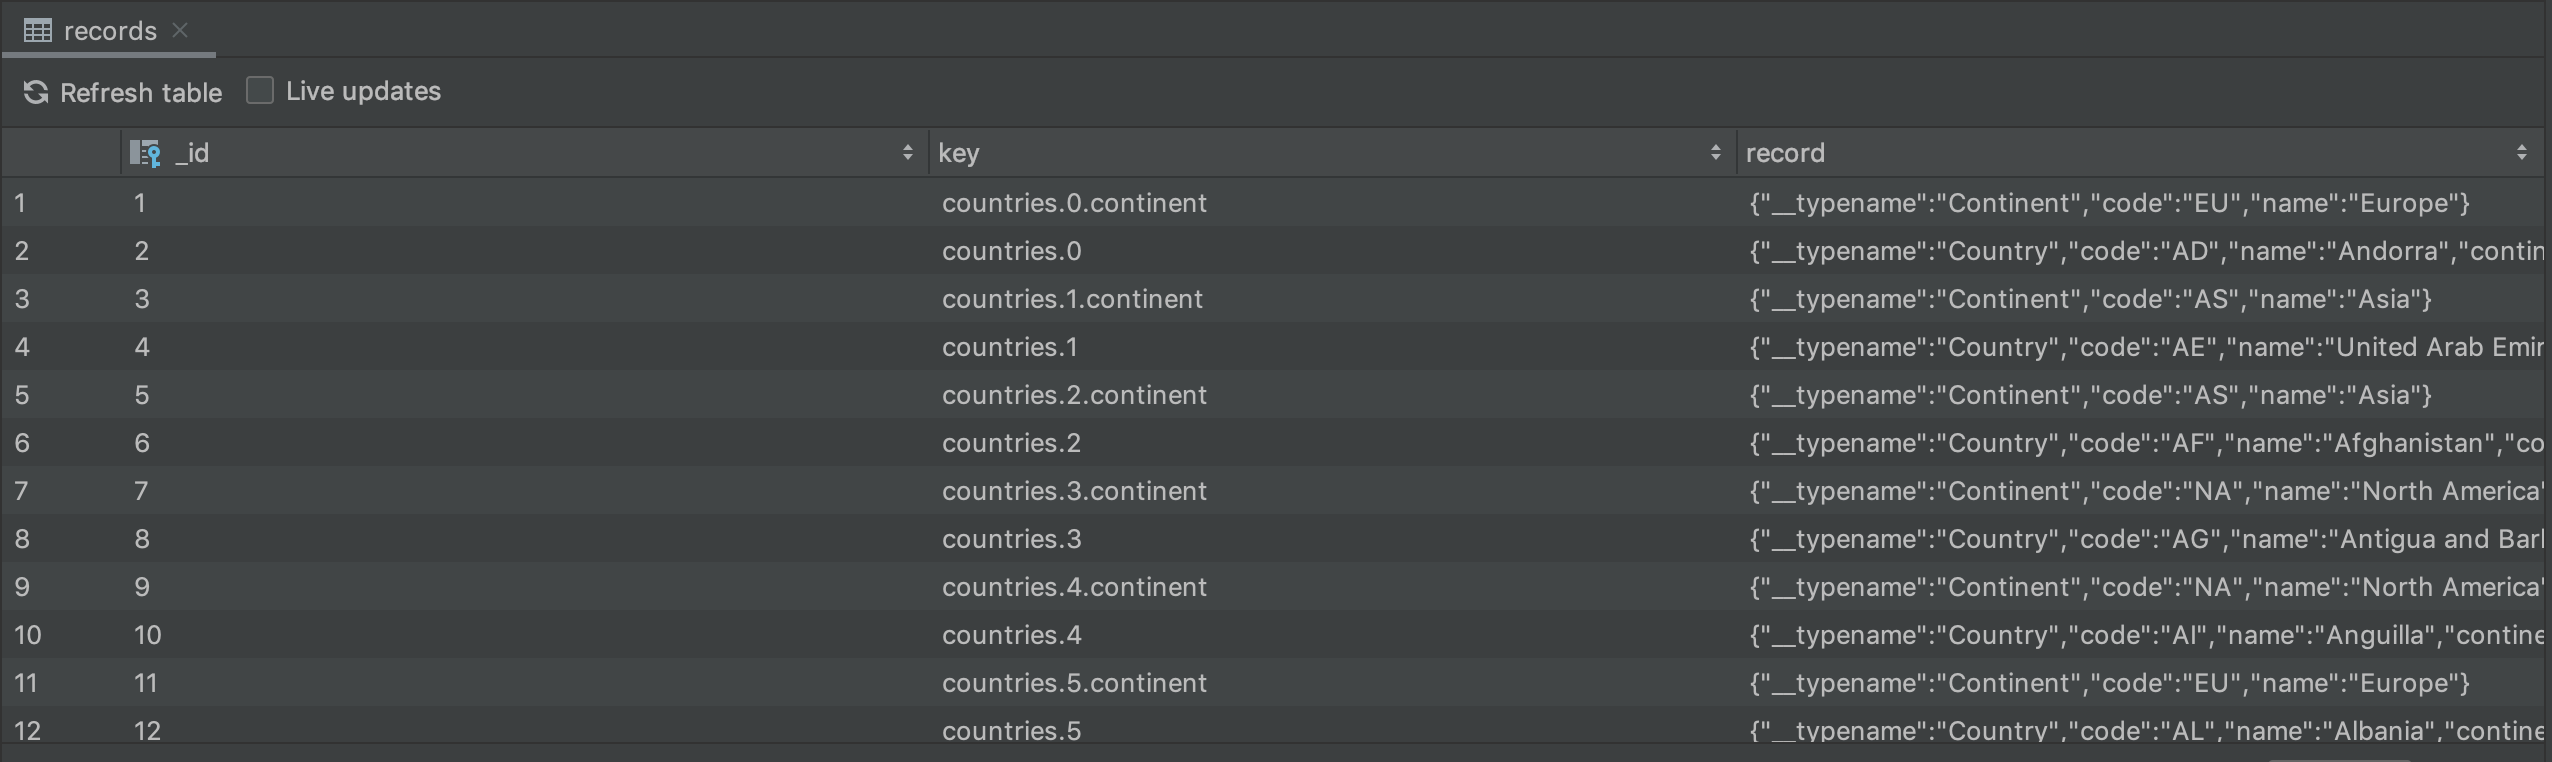
One thing to note here is the interesting identifiers that are set on each item. Since our main query pulls a list of countries, and each Country has a nested object Continent, the identifiers are set with the index of that entry in the response. This isn’t great, because it’s difficult to look up entries in our cache this way, which we’ll discuss later.
Database Inspector
Before we dive into the cache identifiers, we can explore one other way for debugging our cache. This solution is specifically for applications implementing the SQLite database cache. Introduced in Android Studio 4.1, the database inspector is a tool for examining SQLite databases on a device while your app is running.
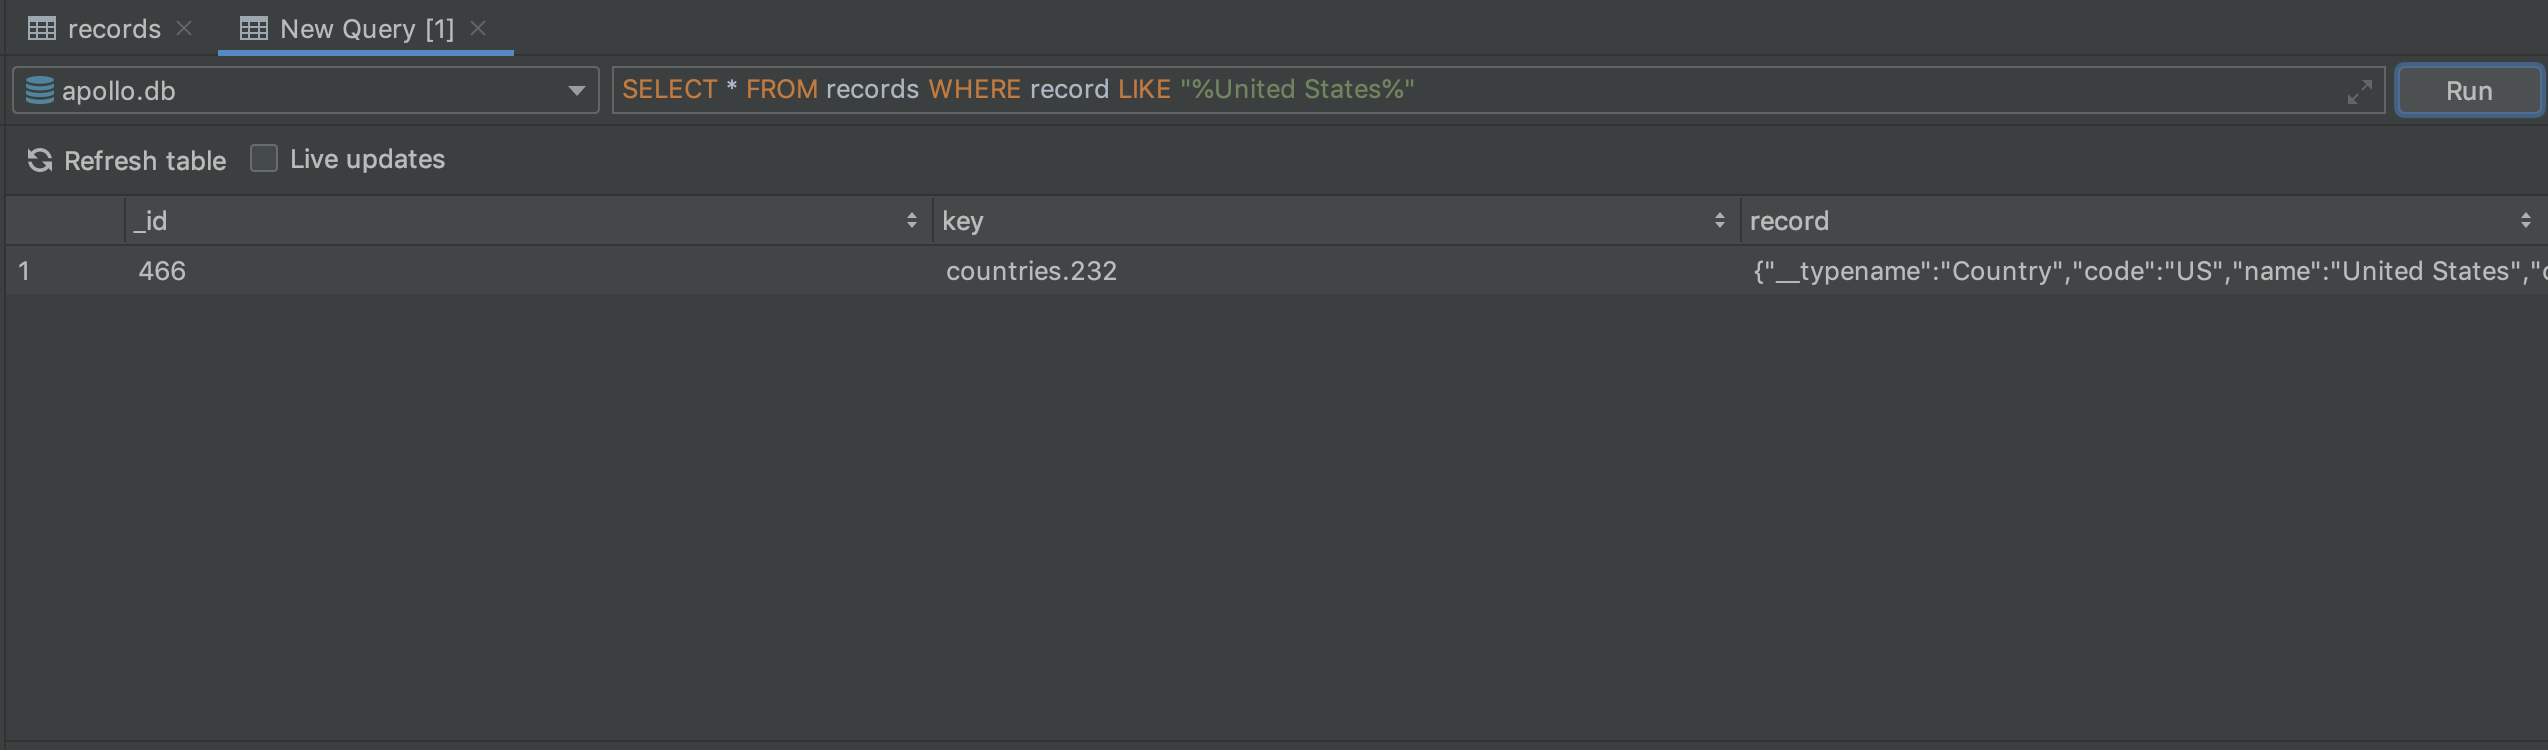
We can use this tool to run specific queries. So if we want to check for a country in our cache, we can write the following query:
SELECT * FROM records WHERE record LIKE "%countryName%"
CacheKeyResolver
Let’s talk about those interesting identifiers we saw on each item. By default, it’s just using the field path. This is fine, but it’s not helpful if we want to look up information later. It also causes us to store information twice, if that information is requested by two different queries.
We can fix this by defining a CacheKeyResolver. This includes two methods, which effectively map to each direction of a network request:
- The method
fromFieldRecordSetis called when a network response returns, and we need to generate an ID for that response. - The method
fromFieldArgumentsis called when we are making a new query, and we want to take those query arguments and convert them into an ID.
fromFieldRecordSet
In our sample app, both Country and Continent objects have a code property that is their unique identifier. Let’s generate an ID with the convention Type.CODE for example, Country.US or Continent.NA.
To do this, we can get the __typename property, which will return Country or Continent, and suffix it with the code property:
override fun fromFieldRecordSet(
    field: ResponseField,
    recordSet: Map<String, Any>
): CacheKey {
    val codeProperty = recordSet["code"] as String
    val typePrefix = recordSet["__typename"] as String
    return CacheKey.from("$typePrefix.$codeProperty")
}
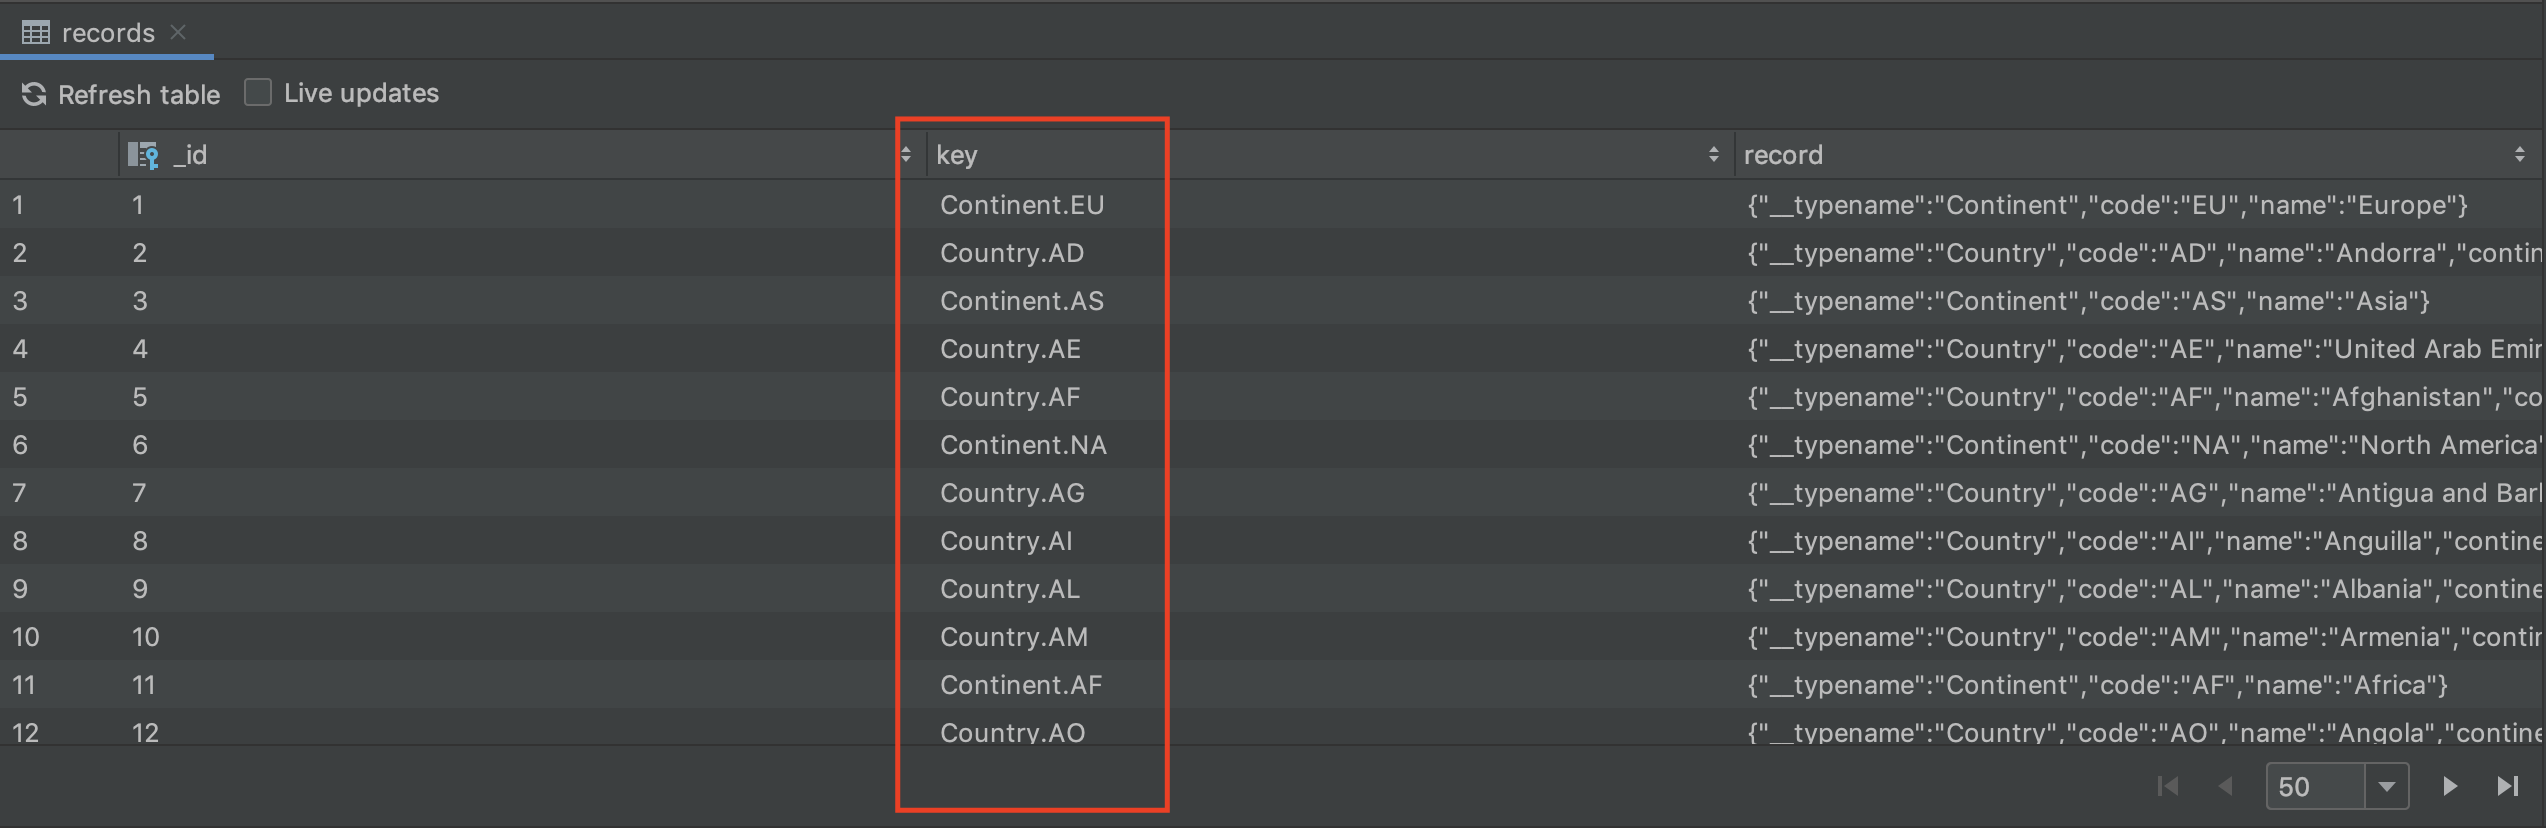
After doing this, you may need to delete or clear your normalized cache, but the next time you run a query you will see the updated IDs. Here is a sample from our database inspector:
fromFieldArguments
When we’re making a request for a country, we supply a code argument. We can check specifically for this scenario, and in that case prefix the ID that we want to use. If we’re not looking for a country, we can just return CacheKey.NO_KEY.
override fun fromFieldArguments(
    field: ResponseField,
    variables: Operation.Variables
): CacheKey {
    return if (field.fieldName == "country") {
        val codeProperty = field.resolveArgument("code", variables) as String
        val fullId = "Country.$codeProperty"
        CacheKey.from(fullId)
    } else {
        CacheKey.NO_KEY
    }
}
Result
Once we’ve put it all together, we supply this resolver at the same time we supply our normalized cache:
val resolver = object : CacheKeyResolver() {
    override fun fromFieldArguments(
        // ...
    ): CacheKey {
        // ...
    }

    override fun fromFieldRecordSet(
        // ...
    ): CacheKey {
        // ...
    }
}

val apolloClient = ApolloClient.builder()
    .httpCache(get())
    .normalizedCache(normalizedCache, resolver)
    .build()
Now that we have this resolver in place, our sample app is actually able to cut down on network requests. Since the main screen requests all of the country info that the detail screen shows, it is able to pull everything from the cache rather than making a new request.
Note that in our project, we don’t show all of this information on the main screen - and that’s fine. Requesting it early is solely for the cache benefit. If your app can support a slightly larger payload up front, you may benefit from this approach in your own projects.
It’s also important to be aware that this only works if the subsequent requests are pulling for the same, or fewer, fields that are in the cache. If the cache doesn’t have all of the fields that are needed, we will have to skip it.
Observing Cache Changes
If you want to be notified any time your cached data changes, all we need to do is change the return type of our queries. Instead of calling await() like in the earlier examples, we can convert our query response to a Kotlin Flow:
apolloClient
    .query(query)
    .watcher()
    .toFlow()
    .collect { response ->

    }
Recap
Unlike the HTTP cache counter part, there was a whole lot more to discuss with the normalized cache. We have two different types of caches. We can chain caches. We can override IDs. We can observe changes, and even modify the cache directly.
However, as complicated as those things may seem, they can be very beneficial to creating a great user experience!